Computer name and connection
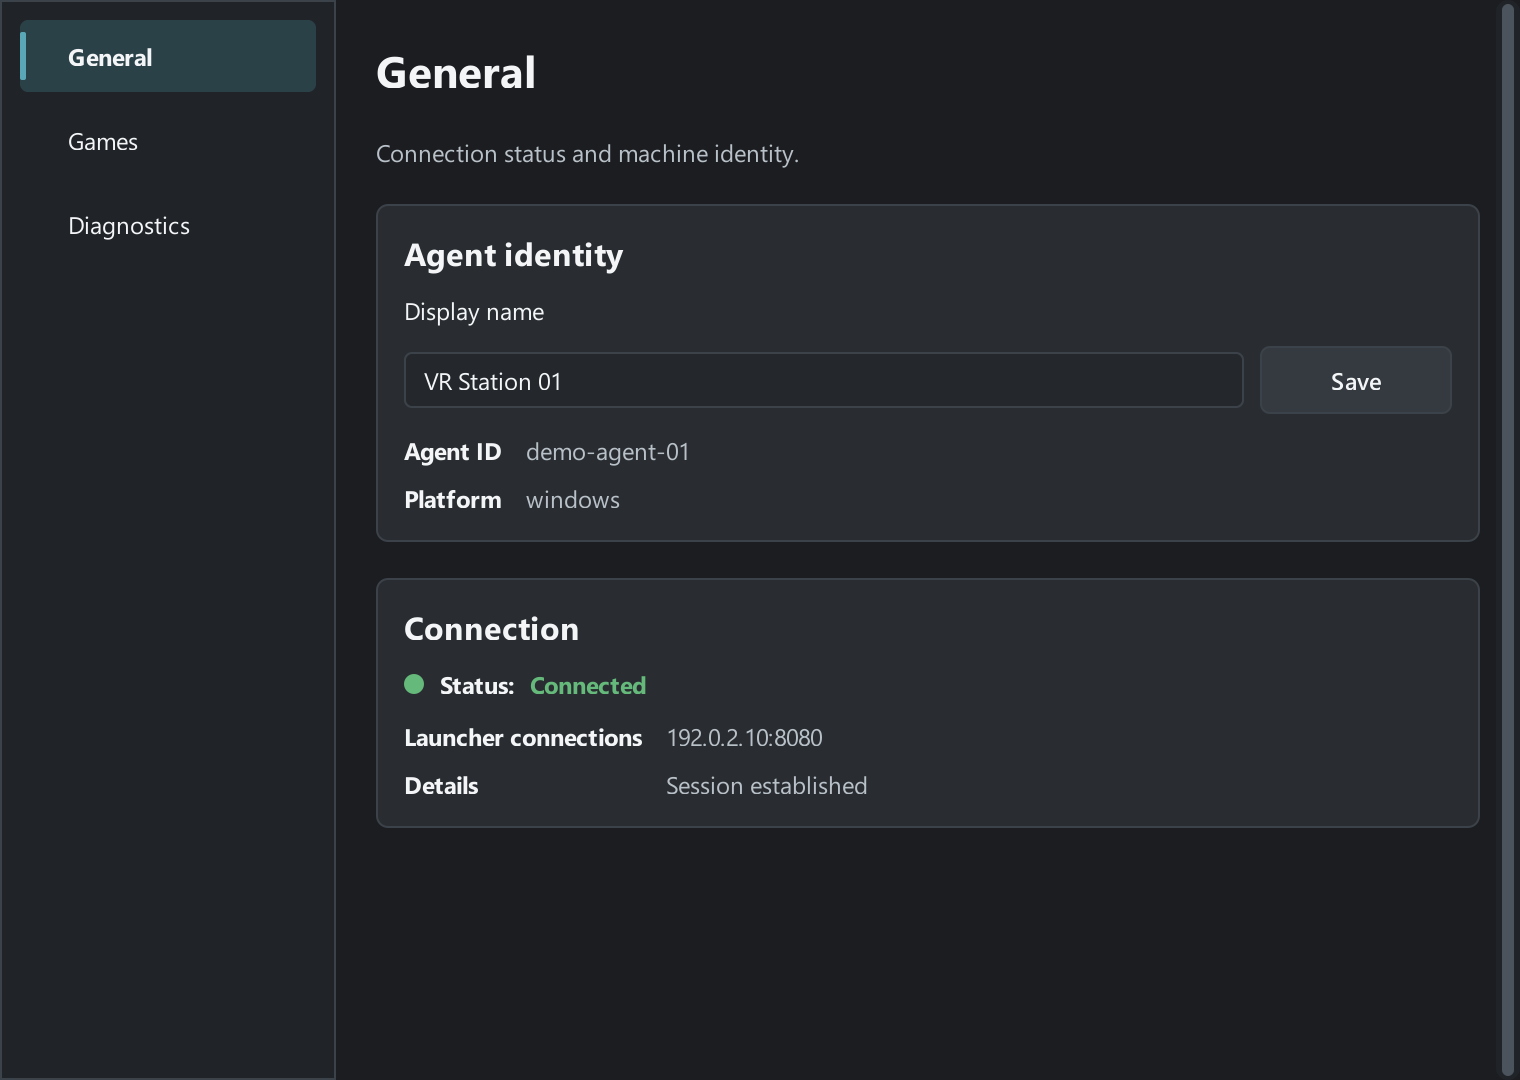
The General tab in Windows Agent shows the gaming PC’s name, its Agent ID, and its connection to Launcher Server. Open it on the computer you want to rename or check.
Open settings
Section titled “Open settings”- Find the New VR Launcher Agent icon in the Windows notification area. Check the hidden icons if needed.
- Right-click the icon and choose Open Settings, or double-click it. If the Agent is not running yet, open the New VR Launcher Agent desktop shortcut.
- Select General in the settings window.
When the system tray is available, closing the window hides the settings and the Agent keeps running. Choose Exit from the tray menu to stop the Agent. If the tray is unavailable, closing the window exits the application.
Change the computer name
Section titled “Change the computer name”- Under Agent identity, enter a new Display name. Use a name you can recognize, such as
VR Station 01. The field cannot be blank. - Select Save and wait for Display name saved. Reconnecting Agent. The Agent reconnects to the server.
- Once the connection is back, open Agents in Launcher Admin for that server. Wait for the list to refresh and check the new name on the computer’s card.
Agent ID is the Agent’s permanent identifier. Use it to match the same computer after a rename. Platform shows the operating system. On Windows it reads windows.
Check the connection
Section titled “Check the connection”Under Connection, look at Status first.
- Connected means the Agent has reached its configured server. Launcher connections shows the server address.
- With automatic discovery, Connected to 1 Launcher or Connected to … Launchers means the Agent is connected to every server it found. Launcher connections shows the name or ID, status, and address of each server.
- With Partially connected, some servers are available. Find the server you need in Launcher connections and check that its entry says Connected.
If the Agent cannot connect
Section titled “If the Agent cannot connect”- If you see Connecting or Reconnecting, give the Agent time to connect. If the status persists, read Details when it is shown.
- Check that the gaming PC is on the venue network and the correct Launcher Server is running. For a manually configured server, compare the address under Launcher connections with the one your administrator provided. If you see Waiting for Launcher Servers or Discovery error, ask your administrator to check automatic discovery and whether the server is reachable from the venue network.
- If you still cannot connect, give your administrator the Agent ID, Status, and any message in Details. You can open the logs by choosing Open Logs from the Agent’s tray menu.
Once connected, check My Agents and Available Agents on the correct server.